You can easily upload or remove photos of your venue.
Head to Settings >> Manage Photos. (It's near the bottom of the settings list.)
If you're editing the photos for the first time, you'll see some example pictures. You can upload new pictures to replace these.
If you don't want photos (or they're not yet ready), just delete the examples. The photos section on your main page with then be hidden.
You can upload a top image. This is full width and is best if it's letter-box shaped.
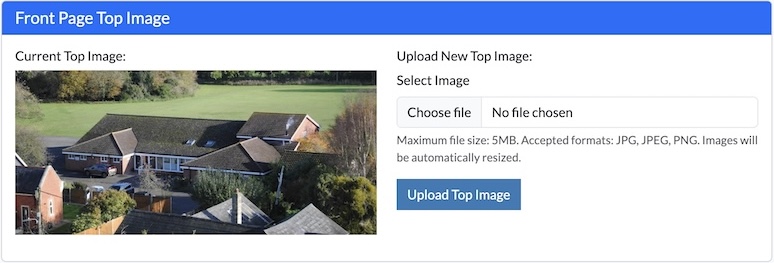
To upload, click on Choose File. Select the file from your device.
Click on Upload Top Image. Wait a few moments for it to upload. You're then done!
The image you upload can be a JPEG or PNG. It must be a maximum of 5MB. If it's bigger, you'll need to resize it.
When it uploads, the system will optimize the image for size further. Keep hold of the original!
You can also upload images to make a gallery, showcasing your venue. Our recommendations:
- Upload photos that are all the same size and orientation. Landscape photos are best.
- Use brightly lit photos!
- Take photos which show the venue set up in different ways. (e.g. with tables and chairs out)
- Remember that you can always add / edit the photos in the future.
How to Upload Gallery Photos
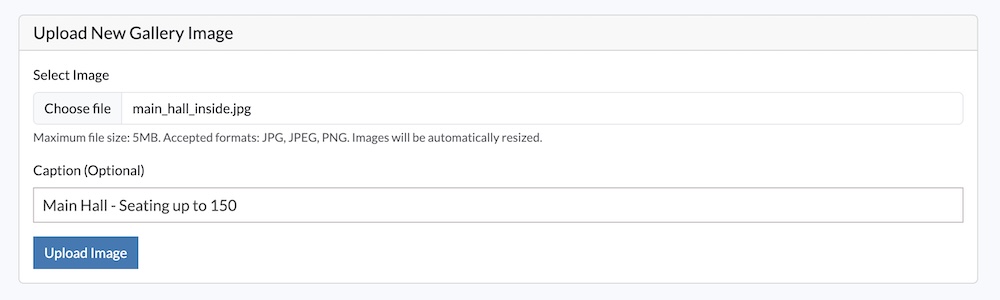
- Click on Choose File. Select the file from your device.
- Add a caption. Keep it short: many of your users will be on mobile phones / tablets.
- Click on Upload Image.
Changing the Order of Photos
You can change the order of the photos in your gallery.
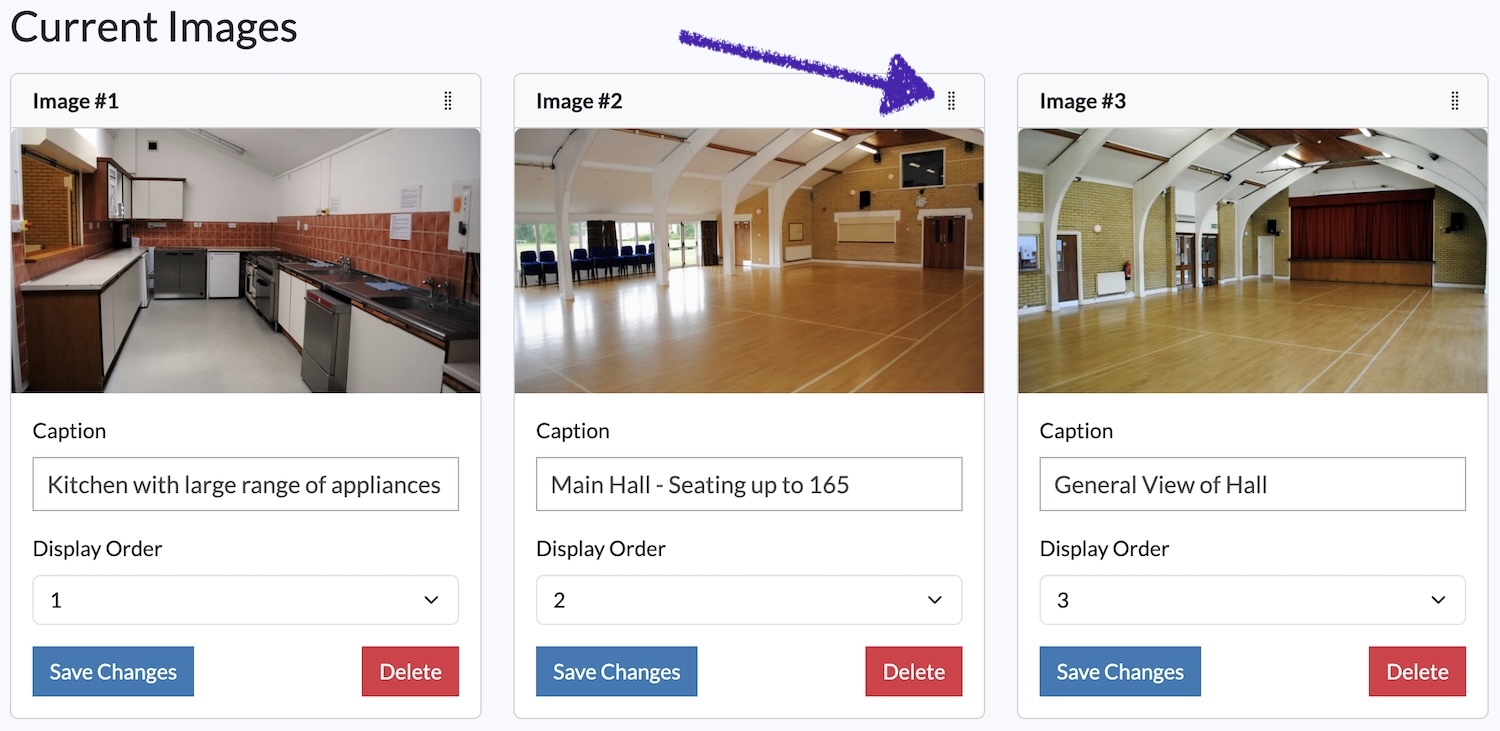
If you're on a computer with a mouse / trackpad, you can click on the drag icon (see image above). Just drag the photo to the desired position. It automatically saves when you release.
If you're on a touch device, use the Display Order dropdown. Just choose the position for the photo and click on Save Changes.
Troubleshooting Image Uploads
The most common issue with uploading issues is that the image is too large. Modern telephones take very large photos - thousands of pixels wide and 10MB or more in size.
It's easy to reduce the size of photos on your device or through free online tools.
If you're getting stuck, please get in touch with us. We'll check the photo for you!
Looking for more help?
Contact us if you need further assistance.